While I recommend that everyone should take a basic first aid and CPR class, that standard Red Cross class won’t be enough when it comes to mass casualties, bomb injuries, and gunshot wounds. With ever increasing rates of active killer events and terrorist attacks, the average citizen needs to start thinking more about battlefield medicine.
The type of training that people need to effectively cope with battlefield injuries was developed by the military and is commonly called “Tactical Combat Casualty Care” or TCCC for short. I teach entire weekend classes on this subject. Some of my friends teach classes that go into even greater depth. You aren’t likely to become proficient by only reading an article, but I can give you some TCCC pointers to help you survive a terrorist attack even if you don’t have any formal training. Here’s what you need to know:
1) Get the patient to safety. In an active shooting event or terrorist bombing, EMS may not be allowed to enter buildings or bomb sites until they are deemed “safe” by law enforcement personnel. That may mean a long wait for you or your patient. If you can get outside to safety, do so. If you can carry your patient to a safer place to wait for medical care, it would be a good idea.
In bombing incidents, remember about secondary devices. You must get out of the immediate area of a bomb blast. The worst possible outcome for your patient is getting blown up again! Look for a casualty collection point in an open area, close to a road for ambulance access, and preferably behind hard cover. Clear that casualty collection point of any potential secondary explosive devices before you start bringing the injured there for treatment.
Some may worry about causing additional injury to a patient by moving him. That may occur, but the risks are minimal. Only about three percent of gunshot wounds or blast injuries do damage to the spine. Penetrating battlefield trauma injuries are not likely to be worsened by moving the patient. Get yourself and your patient to a relatively safe area first.
2) Stop the bleeding. The number one cause of preventable battlefield death is uncontrolled bleeding from an extremity. You have to stop the leaks.
Direct pressure is the standby solution. It works well and will stop bleeding in about 95% of battlefield injuries. For it to work however, direct pressure must be hard and sustained. That limits the rescuer to treating only one casualty at a time. It also may be difficult to perform while exhausted or while you are carrying your casualty to safety.
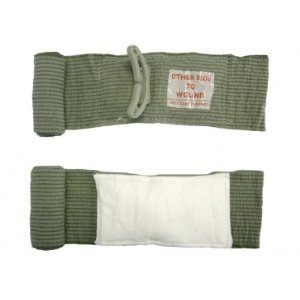
The solution to that problem is a Pressure Dressing. These dressings are merely a way to hold pressure on a wound with a bandage rather than directly from the rescuer. There are lots of good bandages on the market. I like the Cinch Tight, Emergency Bandage (also called the Israeli dressing), or Oleas bandage the best. All will work fine. Pick one and buy a few extra to practice with before throwing them in your kit.
Even if you are carrying your medical kit, you will not likely have enough bandages for a mass casualty event. Practice improvising pressure dressings by using gauze pads combined with roller gauze, duct tape, or ace bandages.
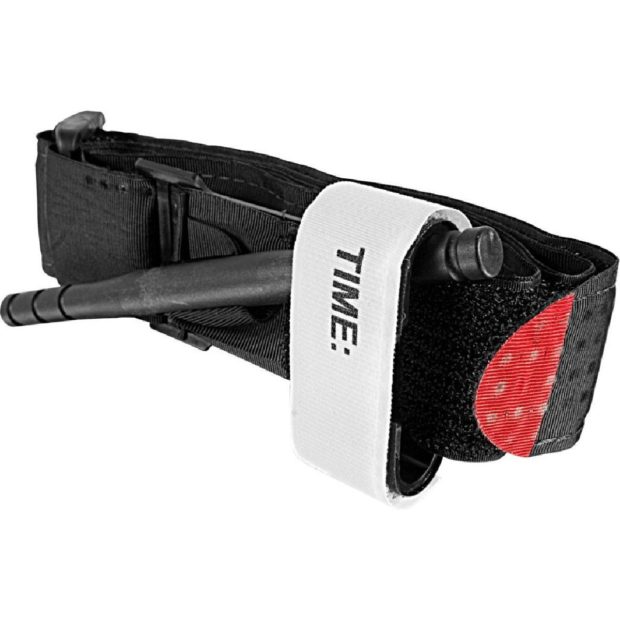
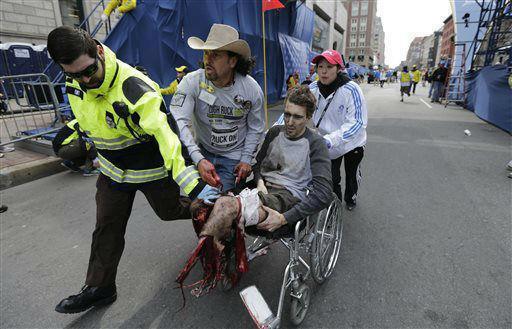
3) Use a tourniquet. For some wounds, a pressure dressing won’t be enough to stop the bleeding. That’s where the tourniquet comes in. Several lives were saved in the Boston bombing when a man trained in TCCC concepts applied at least five tourniquets to patients who were blown up near the finish line of the marathon.
Tourniquets were once demonized and treated as a “last resort”. Recent military experience in Iraq and Afghanistan has changed medical thinking on this previously controversial practice. The military is now teaching aggressive tourniquet use and cites it as the single most successful battlefield medical intervention to prevent death from combat trauma. Not a single soldier in our war on terror has lost a limb from a properly placed commercial tourniquet.
Use a tourniquet in these three instances:
– When bleeding can’t be stopped with direct pressure or a pressure dressing
– As a first line whenever you see spurting arterial blood from an extremity
– On any traumatic amputation
Place the tourniquet as high on the limb as possible (not over a joint) and crank it down until the bleeding stops. In approximately 20% of cases, a second tourniquet may be needed to stop bleeding. Place it directly adjacent to the first tourniquet and crank it down.
Do not loosen or remove the tourniquet. There are protocols for removing tourniquets or converting them to other dressings, but these are outside the scope of this article. It is likely that your casualty will reach definitive medical treatment in less than two hours here in the USA. If that is the case, let the doctors remove the tourniquet at the hospital.
The military primarily uses the CAT Tourniquet and the SOF-T Tourniquet. Be cautious when purchasing CATs online. There are lots of counterfeits. Your tourniquet should cost you around $30. If you find one on eBay for $12.99 it’s probably fake.
Although the CAT and SOFT-T were the only approved military tourniquets for more than a decade, the Committee on Tactical Combat Casualty Care recently updated its recommendations. In addition to the CAT and SOFT-T, they recommended several other tourniquets as well. Check out The Best Tourniquets- A Research Review to see the newly recommended tourniquets and read all the published research on their efficacy.
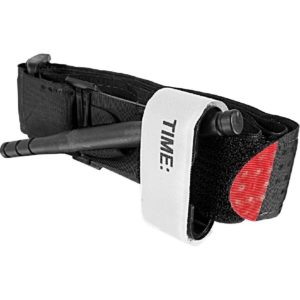
CAT Tourniquet
Also learn how to improvise a tourniquet using a triangular bandage and a windlass. Don’t use a shoestring or zip ties. Make sure your improvised tourniquet is one to two inches wide for optimal effectiveness and to reduce the chance of injury to your patient. Watch this short video by my late friend Paul Gomez about making a simple improvised tourniquet using a keyring and carabiner.
If you don’t have the keyring or carabiner, use whatever you can find as a windlass and hold or tape it in place. Keep in mind that in the best case scenario, any improvised tourniquet has an effectiveness rate no greater than 50%. Don’t plan to improvise when you can carry a commercial tourniquet that works more than 95% of the time.
4) Use a hemostatic agent. What if the bleeding is from a location where a tourniquet can’t be placed? If the wound is on the shoulder, the neck, or the groin, you may not be able to use a tourniquet. In that case, you will need a hemostatic agent. These are basically chemical blood stoppers. There have been several generations of them over the years, but the current crop stops bleeding well and does not produce the extreme heat that earlier varieties did.
While several options are likely to be effective, I would limit my selection to Quick Clot Combat Gauze or Celox Trauma Gauze. These two are the best researched products currently on the market.
If you don’t have hemostatic gauze, pack the wound in the same way with roller gauze (Kerlix) or gauze pads.
Do not pack wounds in the chest or abdomen. Packing is only for extremities and junctional areas where a limb meets the torso.
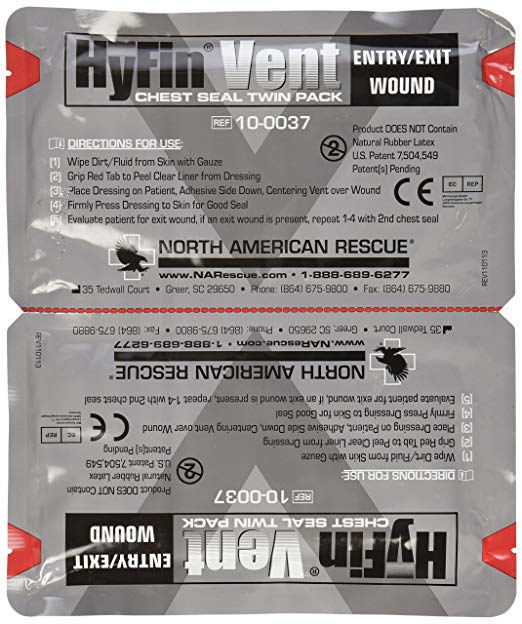
5) Cover penetrating chest injuries. If there is an injury penetrating the body wall anywhere from the diaphragm to the neck (including on the patient’s side or back), it needs to be covered with an occlusive dressing or a commercial chest seal. These occlusive dressings help prevent outside air from building up in the chest cavity and preventing the lungs from expanding (a tension pneumothorax).
There are several types of commercial chest seals. The military medical guidelines state that a vented seal (with one-way vent valves to let air out) is preferable to an un-vented seal. I prefer the HyFin and the Fox chest seals, but any vented seal will likely be adequate.
Use a gauze pad or T-shirt to wipe away any blood around the hole in the body wall. Apply the chest seal. Look for an exit wound and seal that if necessary as well. Position the patient injured side DOWN to facilitate easier respiration.
If you do not have a commercial chest seal, cover the wound with a piece of plastic and use duct tape to seal the plastic dressing down on all four sides. The formerly-taught “three-sided dressing” is no longer the recommended protocol.
Even with the woulds sealed up, a tension pneumothorax can still develop. There are procedures for “burping” the seal or decompressing the chest, but they are outside the scope of this article. After placing the chest seal, monitor your patient for respiratory distress and get them to definitive medical care as soon as possible.
There are many other techniques to learn, but these five steps will get you through most battlefield medical situations reasonably well until the professionals arrive.
I urge you to seek additional training. My company provides regular classes in the Ohio area. I would also recommend the training classes taught by TDI, Lone Star Medics, and Dark Angel Medical. Get some training!
If you can’t get in-person training classes, check out the online TCCC References and the Combat Lifesaver Home Study Course. Both are free.
If you don’t want to purchase these items from the amazon links above, you can get most of them at the following locations:
Stay safe out there.

