After the outstanding responses to Dr. Lauren Pugliese’s previous article on emergency trauma management for dogs, she had numerous readers contact her for followup information. One of the most common questions she was asked was how to apply a longer term bandage once bleeding has been controlled. She wrote an excellent followup post to address those questions. Here is Lauren’s article.
– Greg
Bandages are made of three layers. First, there is the dressing for the wound. The next layer provides padding and support (there are two components to this layer), and then there is the outer layer which holds it all together.
Here is a list of necessary supplies:
Applying the bandage:
1. Place your dog on his side with the injured leg up
2. Cover the wound with a non-adherent dressing such as a Telfa or Adaptic pad.
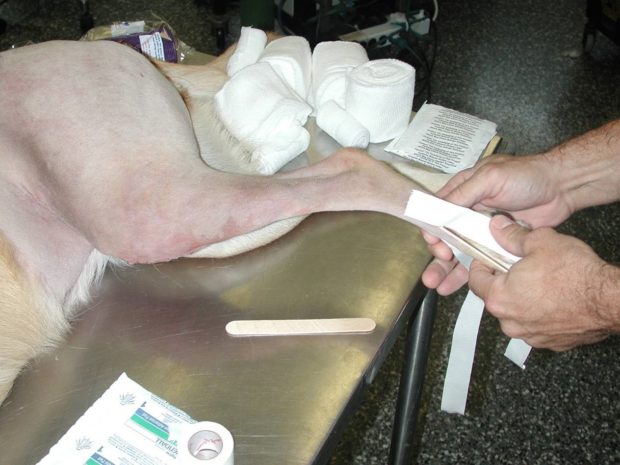
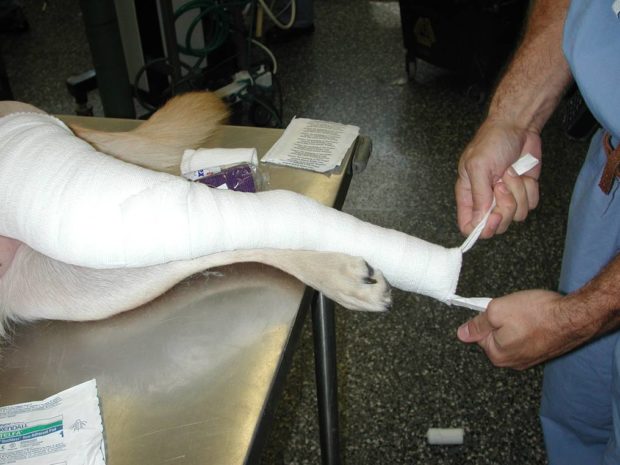
3. Make “stirrups” using tape. Rip two pieces of porous tape that are about 12” long. Place one piece of tape on the side of the foot starting at the ankle and extending past the toes. Put the other piece of tape on the other side of the foot in the same way. It is helpful to stick the ends of the tape that are past the toes to a tongue depressor instead of having them stick to everything else.
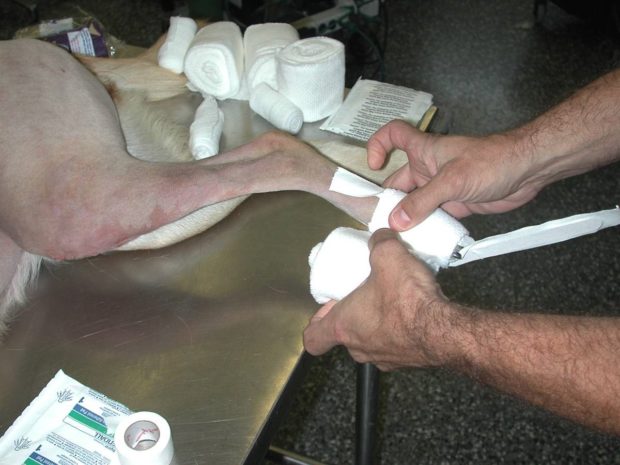
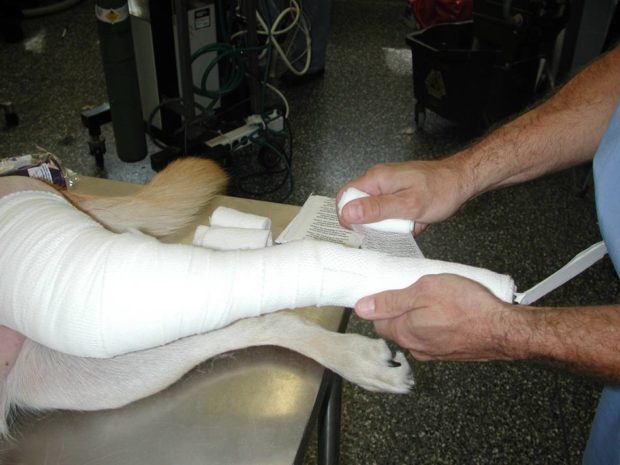
4. With the cast padding, start at the level of the toes. The outside toes are shorter than the middle two toes. Place the padding at the level of the shorter outer toe.
5. Roll the bandage material twice around the foot. You can pull as tightly as you would like because this material usually will rip easily. This secures the bandage to the foot.
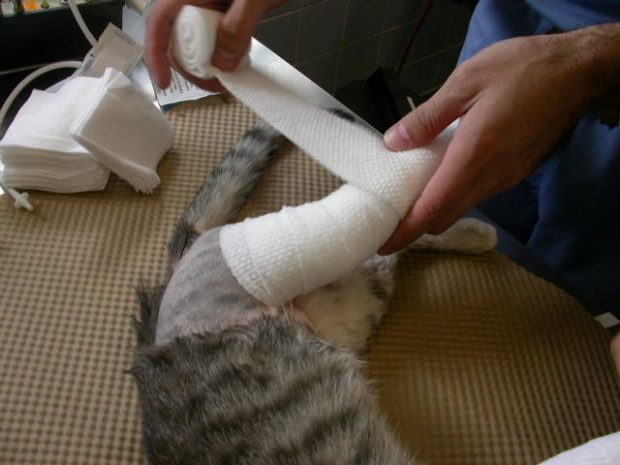
6. Now, on the the third roll around, you are going to move up so there is 50% overlap of the bandage material, still keeping it as snug as you can.
7. With each successive loop around, keep moving up the limb.
8. When you run out of bandage padding material, just start again where the last piece ended.
9. When you get to the top of the limb where you want your bandage, start going back down, always overlapping by 50%.
10. You will want 3-4 layers of padding and the limb will look more like a uniform tube now.
11. The next step is the cling gauze. This can be put on too tightly. You want to start again at the toes and go twice around to anchor it. You should pull hard enough to make a small dent in the padding of a few millimeters.
12. Once anchored, start moving up the limb with 50% overlap. You will want 1-2 layers of cling gauze.
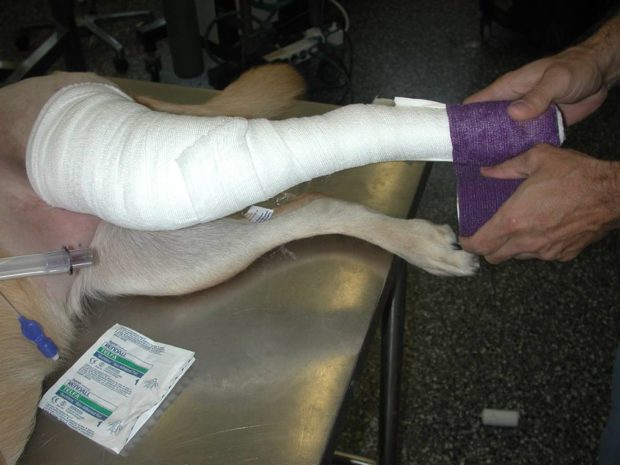
13. If you need a splint, add it here. Lie the splint along the outside (lateral) aspect of the limb and secure it with another layer of cling gauze.
14. Separate the tape ends that extend at the bottom of the bandage and turn each piece 180 degrees so the sticky side of the tape faces the bandage.
15. Lay the tape up along the bandage again. Repeat for the second piece of tape. Now the bandage is taped to the leg with a loop of tape that will help to prevent slipping downwards of the bandage.
16. Unroll the Vetwrap and re-roll it. This makes the stickiness of the self-adhesive looser so it is easier to apply.
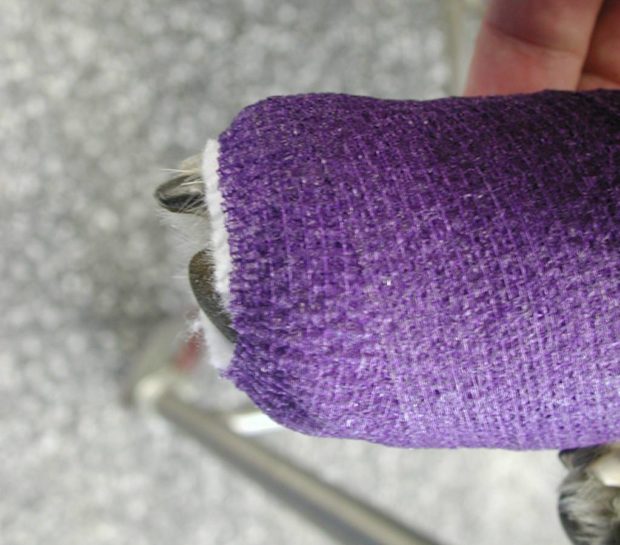
17. Starting at the toes, wrap 1-2 layers of vet wrap over the bandage to provide a water resistant, self-adherent layer that will hold all the other layers in place.
18. You should be able to see the two middle toes. Monitor these for any separation that indicates swelling.
19. Cover the bandage with a plastic bag or protective cover to keep it dry while you are outside on your way to the veterinarian’s office.
Thanks to Dr. Lauren for contributing the excellent article!

