This is part two of a series of articles describing students’ and instructors’ experiences in the classes we teach at TDI.
These articles are a collaboration between Greg Ellifritz and John Motil with input from additional TDI instructors as well.
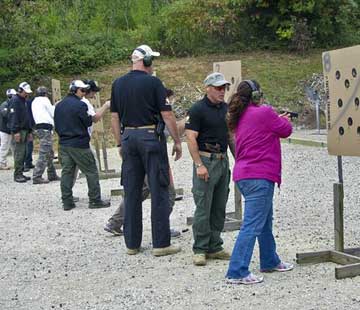
Level 1-3 Handgun is TDI’s entry level handgun course. It is a 3-day course and students will fire approximately 1300 rounds over the course of the long weekend. Some students split the classes up and only take one level at a time. Others do all three days in one long string. Basic marksmanship and trigger control is worked initially. As the weekend moves on, students are introduced to smooth draw, malfunction clearance, reloading techniques, use of cover and some basic building search techniques.
It’s our bread and butter course and the one we teach at least once per month during the shooting season. If you are interested in more information about TDI, go to the website.
Here are John’s comments about the most recent class:
Our first level I-III is over and we were lucky to have some clear and cool weather! 28 students attended Level I, 30 for Level II, and 26 for Level III. We had a good selection of M&Ps, Glocks, an H&K 2000 Compact with LEM trigger, and four 1911s. Calibers were .45,.40, 9mm, and .22LR.
Ammunition Issues
All of the students were able to acquire the required ammunition for the class. That’s a good sign! One student shot all day Friday without a problem. On Saturday he came up and asked me if his Glock needed cleaning or lubrication. The gun was having some malfunctions. (Glocks rarely need cleaning and only need light lubrication on the rails, barrel, and disconnector to function properly). It turns out his new box of ammo (commercial reloads) had high primers. I fired off three duds, picked them up and cycled them through the gun again and they all fired. The first time they were struck seated the primers so the second time they went bang! Please inspect your ammunition before shooting. The ammo shortage has caused munitions companies to speed up production and we’ve noticed quality control problems with ALL brands.
Our M&P 22s worked reliably for the first 2 days of class without cleaning. Then the dirty .22 ammo bug bit, and ejection malfunctions started occurring. The gun was filthy after only 2 days of shooting. After some cleaning and lubrication it went right back to being a very reliable gun. The M&P 22s are packed with grease under the barrel and in the magazines. The M&P9, 40, and .45 usually have the magazines full of oil. Take the time to clean them out so the crud has fewer places to stick! Magazines should be clean and lubrication-free inside the tube! This is critically important for rimfire guns. Rimfire ammunition isn’t sealed as well as the better centerfire rounds. In addition to causing debris buildup, excessive lubrication can seep into the .22 cases and deactivate the primers. Lube it, but go light…and no lube in the magazine!
Holster Issues
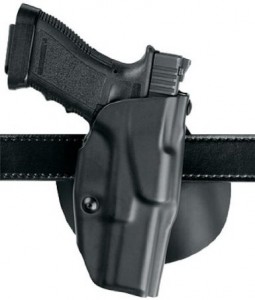
Holsters were mostly Kydex, with some Nylon and Leather mixed in. They included IWB, thumb breaks, and some hybrids. We had one student show up with a shoulder holster. We don’t allow shoulder holsters for safety reasons (the instructors behind the line and the students next to the shoulder holster user get muzzled a lot). When this student swapped swapped it out, he had a flimsy IWB holster that collapsed when the gun was drawn and required two hands to reholster! That usually isn’t safe for the shooter because it’s difficult not to muzzle your own hand in the reholstering process.
You may not get your holster right on your first purchase, but don’t waste your money on something that won’t allow you to safely reholster with one hand. If the holster mouth is floppy or collapses when the gun is drawn, it’s a poor choice to take to a shooting school. We look for a holster that holds the gun without movement, covers the trigger, and doesn’t pull your pants up to your armpits to remove. If your holster meets those criteria, you will have a much better training experience.
At TDI, if you bring a Blackhawk Serpa holster we make you sign and additional safety waiver. Many LE agencies and training schools (including FLETC) have banned Serpas. The USAF Special Ops unit recently banned it as well. Shouldn’t that tell you something? There are a lot of negligent discharges that involve Serpa holsters. There are better options available (like the Safariland ALS) if you want a security holster.
Any quality magazine pouch will work for class, but the low profile kydex ones work best under stress. We teach carrying the magazine with bullets facing forward on the weak side of the body. Most kydex makers like Comp-Tac, Raven Concealment and Blade-Tech make their mag holders with this carry method involved. Of the most common manufacturers, only Blade Tech makes an option for bullet noses facing the rear. Pay attention to this when buying magazines holders.
Gun Issues
If you bring a 1911, we are going to ask you to work the thumb safety on every presentation and keep your thumb on the safety while you are firing. I don’t think anyone wants to inadvertently apply their safety in a gun fight, and that is what can happen if you place your thumb below the safety after you swipe it off. We want your training drills to replicate real life as much as possible. If you carry a 1911, you must remove the safety reflexively with each presentation. Lots of students forget to take the safety off when they are under the slightest bit of stress. After about 1000 repetitions of taking the safety off over the weekend, most 1911 shooters will notice that they don’t have to think about the safety as much. If we let you get lazy and keep the safety off when shooting repeat drills from the ready position, you’ll forget to take it off in real life. As instructor David Bowie says: “We respect cheating. We just don’t allow it!”
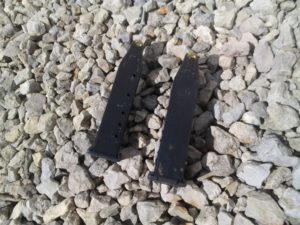
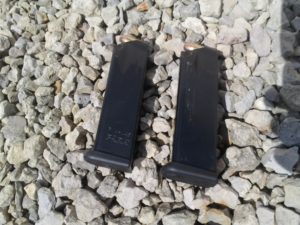
One of the 1911s in class had problems with reloads and another had problems with a counterfeit magazine. The counterfeit mag had the correct base pad but you can see the subtle differences from the original in the photos below. The shooter saved $30 but had one less magazine for class. Three magazines will get you through the class, if they all work. You get what you pay for. The quickest way to screw up a gun’s functioning is to use cheap magazines. If you are spending several thousand dollars (between tuition, ammunition, and lodging) for a weekend shooting school, don’t let your experience be ruined by a crappy aftermarket magazine!
If you bring a traditional double action autopistol, we are going to ask you to decock it to DA after every presentation. It is amazing how many students return with striker fired guns after their initial class with a 1911 or DA/SA gun! If the gun has a safety that is stiff to manipulate you aren’t going to want to use it properly. When you purchase a gun, try the safeties on a few different guns of the same model or style and see if one is easier than the others. Sometimes a little polishing or lubrication can go a long way!
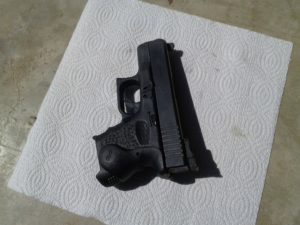
Guns with targets sights, extended slide locks, laser grips, and rubber grip sleeves might work well in your dry fire routine but tend to cause some real pain when you have to shoot, manipulate, and handle them one handed over a three day course. We had one Glock with the target front sight that couldn’t even be drawn from the holster properly.
I think the KISS principle should be applied. The only things Glocks need are high visibility steel sights, and an intermediate magazine release, (GLOCK designed one for the FBI, they just won’t sell them to the public yet). All polymer guns also need some polishing under the trigger guard where the middle finger rests. The small mold line on can really cause quite a blister after a few hours of shooting and it only takes some sandpaper or crocus cloth to fix the problem. I have provided a photo of and M&P before and after polishing.
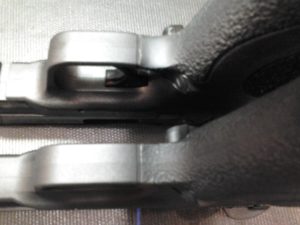
Smooth out the area under your polymer pistol’s trigger guard. The mold lines will cause blisters or abrasions on the knuckle of your middle finger if you don’t.
I had one student that was shooting left consistently. When I looked at his sights the problem was obvious. His front sight was way out of center. He said he paid a gunsmith $50 to install his new night sights. I told him next time to make sure the gunsmith owned a set of calipers so he could verify the sights were centered instead of eyeballing it with a brass punch and hammer. When we install sights we use sight pushers that are designed for the specific gun and check our work with a calipers. Otherwise we have to do it on a range and verify that the round impacts to your point of aim! Just like I mentioned in the last article, paying someone to put on your sights is fine if you don’t know how to do it yourself, but make sure your “gunsmith” is professional!
That’s enough for this class! John will be back soon with additional observations from the next TDI course.

